Facebook

Setting up your E-mail Account in Microsoft Outlook 2007

Let Us Help You To Setting Up Your E-Mail Account In Outlook!

tips to configure outlook

Setting up your E-mail Account in Microsoft Outlook 2007

This tutorial shows you how to set up Microsoft Outlook 2007 to work with your e-mail account. This tutorial focuses on setting up Microsoft Outlook 2007, but these settings are similar in other versions of Microsoft Outlook. You can set up previous versions of Microsoft Outlook 2007 by using the settings in this tutorial.

To Set Up Your E-mail Account in Microsoft Outlook 2007

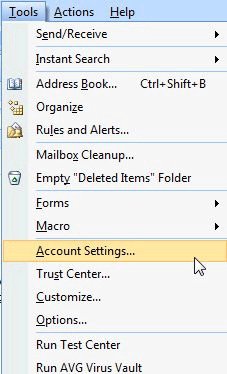
1. Open Outlook. Select Account Settings... from the Tools menu.

Outlook Settings

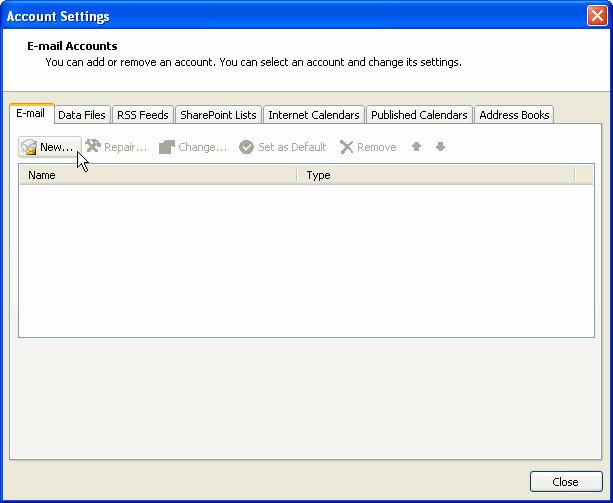
2. On the E-mail tab, click New.

Add Email Details

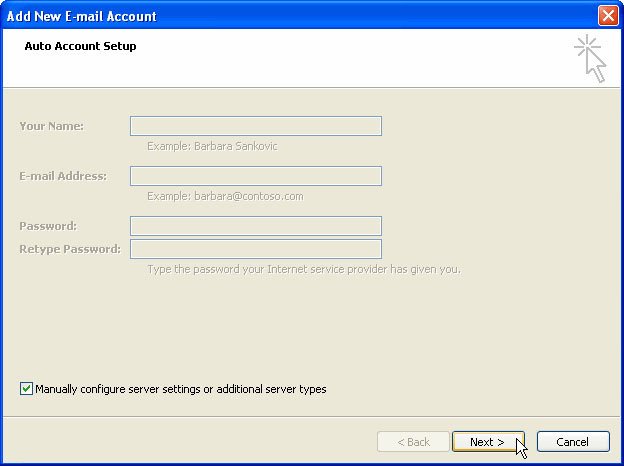
3. Select "Manually configure server settings or additional server types" and click Next.

Add Server Details

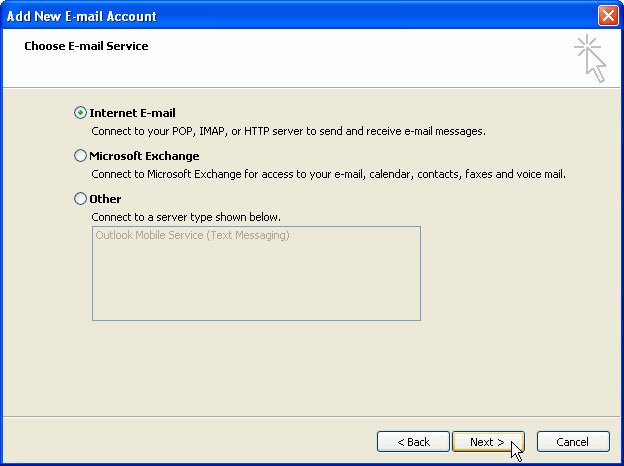
4. Select Internet E-mail and click Next.

Outlook 2007 Configure

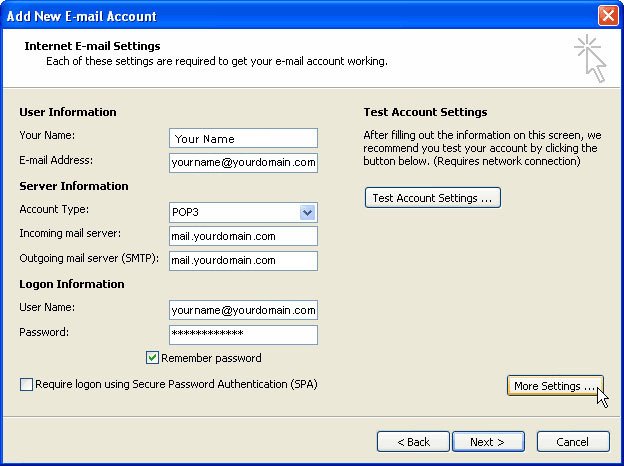
5. Enter the following information for E-mail Accounts.

  • Your Name: Enter the name you wish recipients to see when they receive your message.
  • Email Address: This is the address that your contacts' email program will reply to your messages. This is also the address that will get recorded in your contacts' address book if they add you as a contact.
  • Account Type: POP3
  • Incoming mail server: Enter mail.yourdomain.com
  • Outgoing mail server (SMTP): Enter mail.yourdomain.com
  • User Name: Enter your full e-mail address
  • Password: If you wish for Outlook to save your password, check the box labeled Remember Password and enter your password in the text field.
  • Click More Settings...

Outlook Configuration

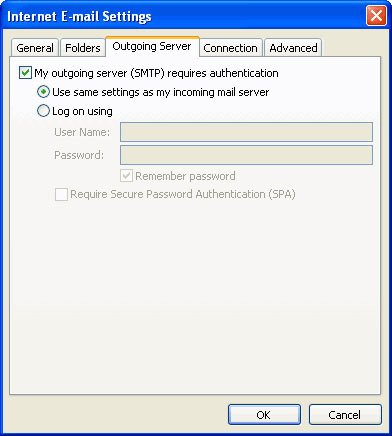
6. Click on the Outgoing Server tab, and check the box labeled My outgoing server (SMTP) requires authentication. Then choose to Use same settings as my incoming mail server

Add Server Info

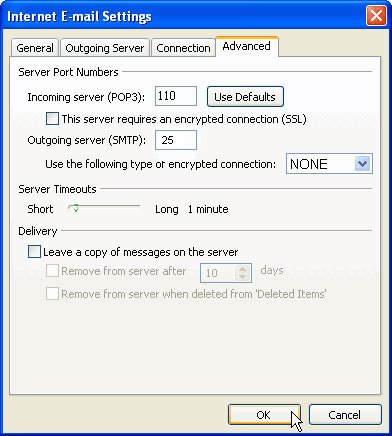
7. Click on the Advanced tab.

  • Under Incoming Server (POP3), the port number should be set to 110.
  • Under Outgoing Server (SMTP), the port number should be set to 25 or 26.

Add Port Details

8. Click OK

9. Click Next. Click Finish.

Subscribe to Our Newsletter!

Join us to stay updated with our latest blog updates, marketing tips, service tips, trends, news and announcements!